Showing posts with label Girls. Show all posts

8.2.12

Mini Clipboard last minute birthday present

I had one day's notice for a birthday present.  Well I did know about it, but it was always "next week".  


Then yesterday, Amy announced "tomorrow's my birthday!"  


Amy loves little cute things, so under the short-time-frame-circumstances, I opted for half bought/half handmade and dashed out to the shops and came home with a key-chain pen.  I covered a cork coaster with pretty paper and mod-podged it.  I found some note paper and rounded the corners and fastened the stack of paper to the clipboard with a mini fold-back clip.  


She was over the moon with her mini clipboard!


Supplies


All done!

31.1.12

Little Lined Purse Tutorial


This little purse is for a very lovely little lady who turned five today.  She is very elegant and sophisticated and her mum has taught her girls to love pretty things.  I thought I would photograph the process because I think it's a great gift for anyone of any age, and all you need is fabric scraps and a zip!


I cut two outer pieces and two lining pieces of fabric 7" wide, 6" high and chose some ribbon and lace.  I measured my pieces based on the 15cm dress zip that I had.


Two inches down draw a line and then place your ribbon
on that line to measure the next line.
Draw a line 1/4" in from each line
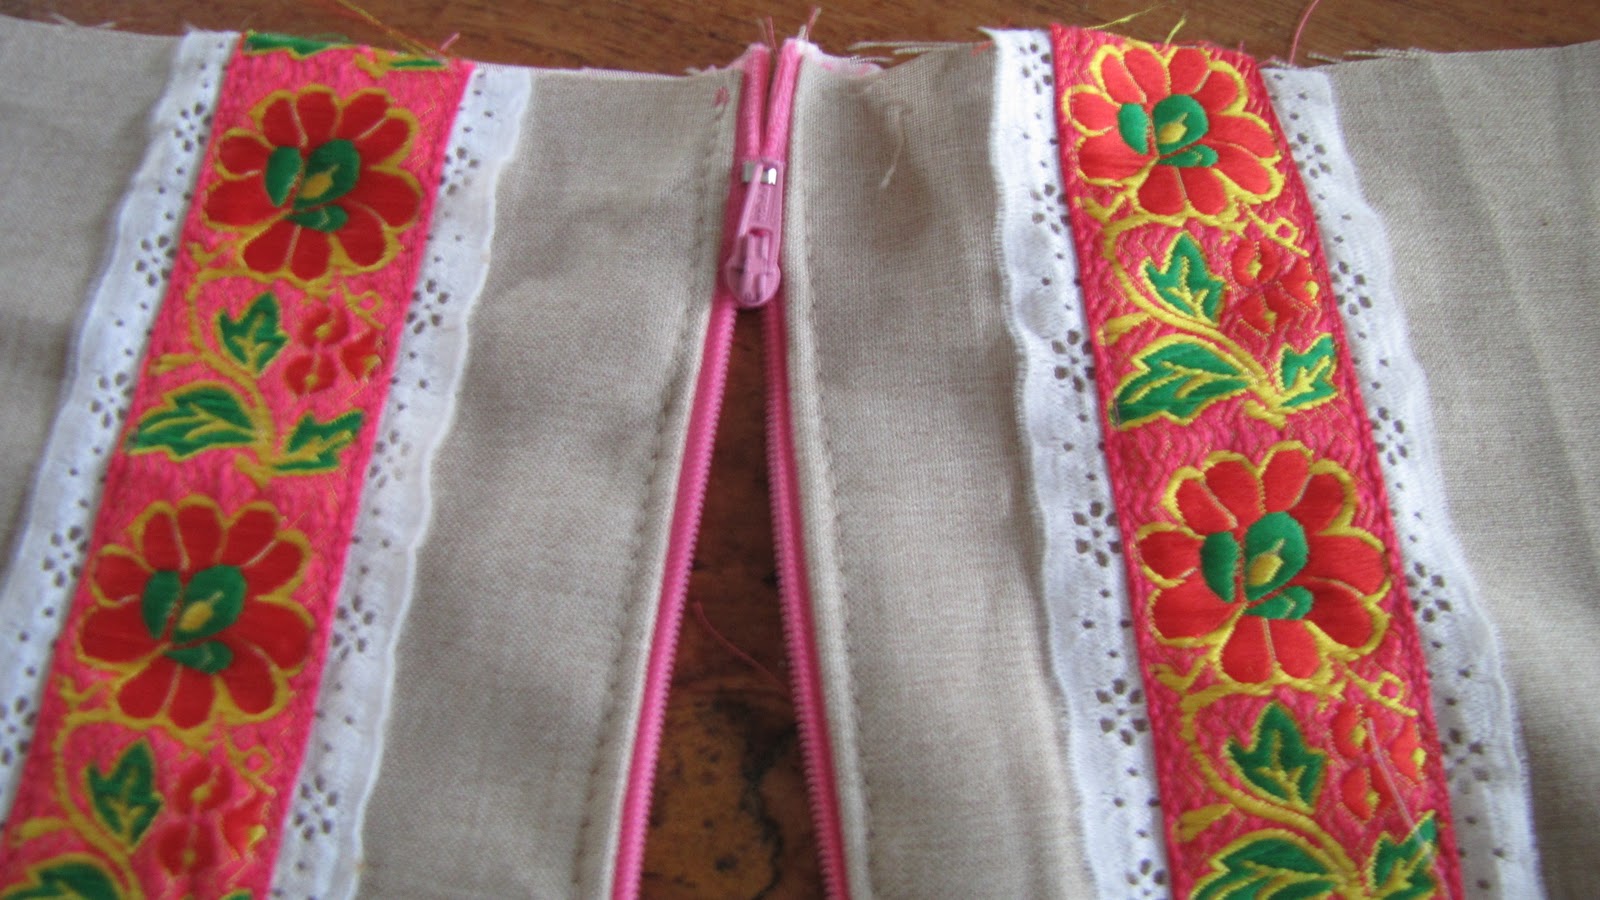
Place the lace on the inner lines and pin
Stitch down
Centre the ribbon between the two strips of lace and stitch right on the edges

Sandwich the zip between the outer fabric and lining with right sides
facing and right side of zip facing right side of outer fabric, and stitch.
Flip over so wrong sides face and stitch with a long stitch.
Do the same to the other side of the zip
Make sure the zip is open and lay the right sides of the lining together
and right sides of outer fabric together.  MAKE SURE that your ribbons
meet perfectly, with right sides facing and stitch all around, leaving a
 small opening in the lining fabric. Here you have the option to
 box the corners
Turn the outer fabric through the zip opening and through the hole
in the lining and put the lining back into the bag,
and use a ladder stitch to close up the hole.
Add a charm or ribbon to the zip if you want.
Happy Birthday Rhubarb, Rubles, Ruby Rubes.


I have also been playing around with some stamping.  Something for a ten year old birthday in a week's time.
Quite into the stamping, I am.


So this is the last day of January.  It was good; I enjoyed it, but I'm look forward to February.  Our calendar seems to be jampacked with goodness, Rod Stewart, a girl's night out, Waitangi weekend with Whakatane friends, Napier's Art Deco Week, a SA vs NZ cricket game, a four-year old starting morning kindy, and the beginning of a year of study.  A lot going on in the next 29 days.

30.1.12

I-Spy bag and a Tractor T

Last night I whipped up an I-Spy bag for Emma.


It was quite a quick project.  I didnt follow a tutorial but a quick search has come up with a great tutorial on Skip To My Lou.  She has a beautiful blog and a facebook page.  If you 'like' her page, you can then download a beautiful printable calendar for 2012

The kindy-boy's tees are getting a bit grubby, so we did some stamping to hide the stains spruce them up.  I so often have to let go of wanting to do it myself so that it's just right, because often they arrive just as the project starts.  


His corner:  


My corner:


We adults always want it to line up, don't we?  I'm so pleased that I've hung this up to dry and not quietly slipped it into the bin as a project 'that didn't really work out'.  He will end up LOVING this t-shirt.  That's what counts.


Using a piece of felted wool works well as a stamp pad.  It works better than having the ink on a hard surface.

29.1.12

Butterick 9715 - Vintage romper

I needed a break from the bridesmaid's dress so I dug out a vintage pattern that was given to me buy Granny Ormond.  Just as I was about to start, Lesley, (Granny Ormond's daughter) arrived and we tackled our way through a little romper.  There were no instructions and the patterns don't have markings on them, so it was quite a challenge, but I enjoyed it.  At this stage, everything I sew is such a learning process.  


28.1.12

Ribbon headbands

I had two ten year old girls for the day.  In the last hour of their visit, they asked if they could sew something.  I convinced them to make headbands and remembered some stripey ribbon I had and knew that this would be the quickest way to go. They got lost in my bags of fabric and started wrapping and draping themselves and I was left to sew...


The process is really quite simple, I eye-balled it and it worked, but I realised that if they had been the wrong fit, I would have had to unpick six rows of forward and backward stitching.  My suggestion would be to put your stitch length on the longest and give each join one row of stitching before trying it on.